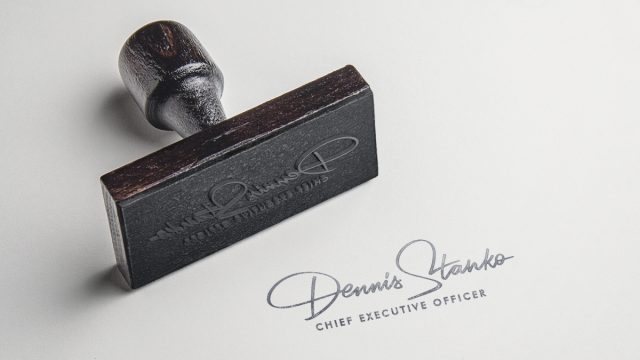
Custom metal stamp creation has become increasingly popular in many industries, especially in artisanal and manufacturing sectors. These stamps are sought after for branding, personalization, and artistic expression, offering a unique way to add a personalized touch to products. For small business owners, artists, or anyone interested in customizing their products, metal stamps provide a means to make a lasting impression and build brand identity and customer loyalty.
Exploring the specifics of designing a custom metal stamp involves both creative and practical considerations. It starts with choosing a signature design, considering factors like size and style, which forms the basis of customization. Next, selecting the appropriate metal materials is important, each offering unique benefits in terms of durability and detail. Working with experienced stamp makers ensures the conceptual design becomes a tangible tool. Testing the stamp for precision comes next, followed by implementing the signature across various materials. This article will guide you through these steps, offering tips to enhance the effectiveness and personalization of your custom metal stamp.
Step 1: Choose Your Signature Design
Contents [show]
When choosing your custom metal stamp design, start by focusing on its appearance. This first step involves deciding on factors like size, style, and complexity. Consider this process carefully: while larger designs may be clearer when stamped, they often need a simpler style to stay clear in small sizes or in high detail. Your chosen style reflects your personal or brand identity, so pick one that matches the message you want to send.
To ensure your signature translates well from paper to stamp, make sure the design isn’t too detailed, as this could cause important elements to be lost during stamping. This step sets a clear creative direction for the next stages of making your custom metal stamp. The design you choose not only affects the stamped result but also influences the type of metal used to make the stamp, which is discussed further in Step 2 of your project.
Step 2: Select a Metal Stamp Material
Moving to the next important step involves choosing the right metal for your custom stamp, with common options including stainless steel, brass, and aluminum. Each metal brings its own unique qualities to the final product. Stainless steel is prized for its exceptional strength and resistance to corrosion, making it perfect for frequent use.
Brass, known for its ability to capture fine details due to its softer nature, adds a vintage touch and works well for stamps with detailed designs. Aluminum, lightweight and rust-resistant, offers a balance between detail and durability. Your choice of metal not only impacts the stamp’s performance and lifespan but also influences the clarity and precision of your signature imprint.
Step 3: Work With a Metal Stamp Maker
As you progress in creating your custom metal stamp, it’s important to collaborate with a skilled metal stamp maker. After choosing your design and the right material, the next step is to work with a professional manufacturer. Providing clear, detailed specifications to the stamp maker is a must—this includes the design, size, and the depth of engraving needed for the best impressions.
By closely collaborating with the manufacturer, you can explore different production techniques to ensure the final product accurately reflects your signature design. This partnership allows for adjustments and refinements to be made, ensuring that every detail of the stamp meets your standards and fits the functional needs of your project.
Step 4: Test Your Custom Metal Stamp
Before regularly using your custom metal stamp, you should conduct testing to ensure optimal performance, whether for personal use or for products you plan to sell. Start by conducting an initial testing session on a material similar to your primary project substrates. This helps replicate final conditions and identifies any necessary adjustments to ensure clear design and precise impressions.
If the initial impressions are unsatisfactory—such as unclear details or inconsistent imprints—consider modifying the stamp’s design or application method. During this testing phase, experiment with different pressures and angles. Thorough testing guarantees that the final results are not only visually pleasing but also functionally effective, preventing costly errors on actual products or valuables.
Step 5: Implement Your Signature Design
Now that your custom metal stamp perfectly embodies your signature design, it’s time to embark on the exciting next phase: applying your unique mark across various materials. Whether you’re stamping on leather, enhancing paper goods, or labeling custom crafts, each imprint serves to enhance the perceived value and originality of the item. Consistency is key—ensure that every application of the stamp yields a clean and uniform result, reinforcing your brand’s quality and attention to detail.
As you transfer your signature onto different surfaces, take into account the thickness and texture of each material. For example, softer materials like leather may require less pressure, while harder surfaces might need a firmer touch. Actively engaging in this step not only expands the usage of your stamp but also cements your personal or business brand in a tangible form. This process, a fusion of art and technique, demands a specific understanding of materials and their interaction with the custom stamp, empowering you to make each product uniquely yours.
Creating a custom metal stamp featuring your signature is a rewarding and artistic endeavor. This guide has outlined the systematic process—from choosing a meaningful design to selecting durable materials and collaborating with a metal stamp creator for accuracy. Each step ensures that your unique signature is showcased with authenticity and professionalism. Whether for personal use or enhancing business items, your custom metal stamp serves as a symbol of both creativity and practicality, marking each product distinctly as your own.


