Everyone knows that shaders are the best way to improve graphics and visuals in the world of Minecraft. These are capable of taking your gaming experience to another level that you never imagined. However, without a Shader pack, you will have to be exploring the game’s default visuals. These have come under some heavy criticisms in the Minecraft community in the past.
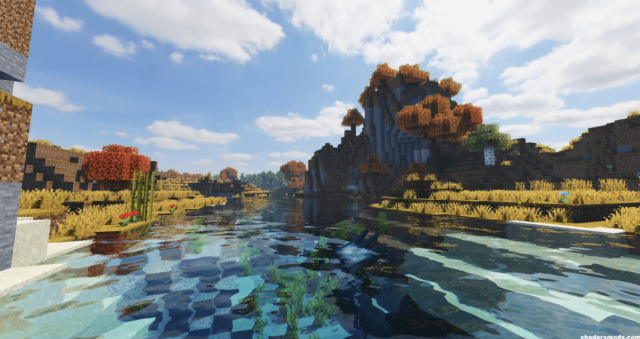
However, with a shader pack, you will get an upgrade in your world’s graphics. In other words, your world is going to be looking very realistic. Imagine the skies coming alive. What about the trees, grass, waters, and everything that defines nature? All of these will be having an improved look.
Here is the only challenge
Contents
Having known what shaders can add to your world in Minecraft, there is no doubting the fact that you can’t wait to have one installed today. However, the truth is that such is not a straightforward process. Simply put, you will need the correct information for shaders to be added appropriately in your world.
The good part is that you have come to the right place, where everything about how to get shaders in Minecraft will be discussed. This post will be showing you the most reliable and effective ways of having a shader pack today. Regardless of any shader, you must have chosen to use in your world, ensure to apply the details below.
Installation of OptiFine
Without OptiFine being installed, your shader pack isn’t going to work as expected. Therefore, you need to ensure that it is installed first. Of course, this has a role to play. For instance, it will help to optimize your game’s graphics. However, there is nothing technical or complex about OptiFine installation. Just follow the steps below, and you will be fine.
Step 1
Download OptiFine. This should be the definitive version that is compatible with your Minecraft.
Step 2
Once the above has been downloaded, the installer should be clicked on. When you have done this, the installation is going to commence automatically. A profile will also be created in your Minecraft launcher called “Optifine.”
Step 3
Minecraft launcher should be started. After that, open the OptiFine profile. The best way to know whether this has been done correctly is by finding the “OptiFine” profile on the screen.
Once you have downloaded and installed OptiFine, as explained above, you can now proceed to install your shader pack. Follow the steps below.

Installation of Shaders
Step 1
Download your preferred shaders, most shaders online are free to access from the Google, or fan and player community websites such as MinecraftShader.
Step 2
Once the shader has been downloaded successfully, the Minecraft launcher should be opened. Now, start playing the OptiFine version.
Step 3
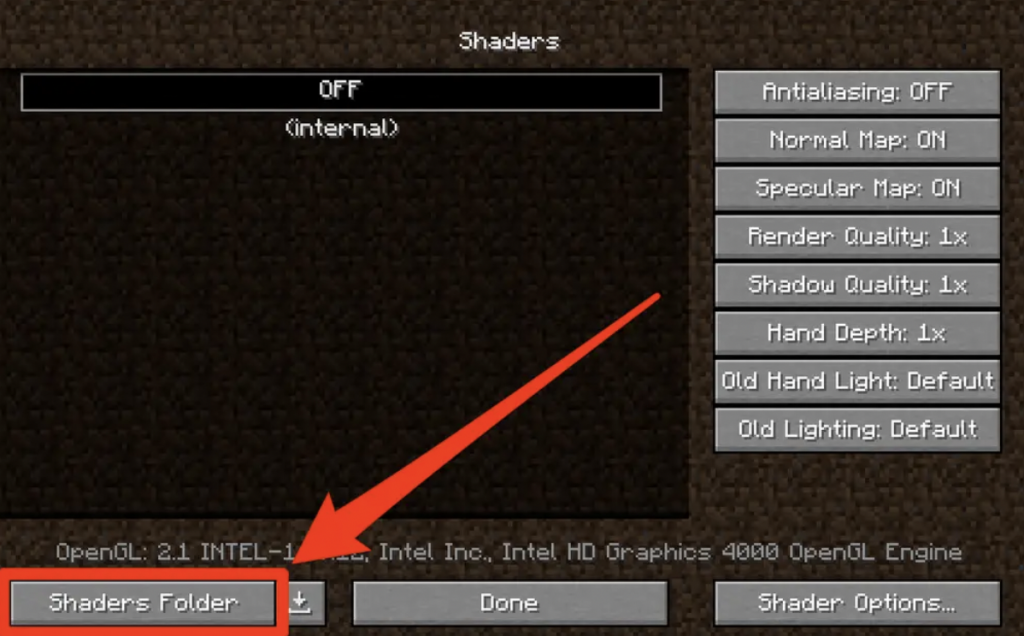
Head over to Minecraft main menu and click on Options > Video Settings > Shaders. Next, the shaders folder button should be clicked on.
Step 4
Now, the downloaded shaders in step 1 will have to be moved into the shaders folder. Once this has been done, Minecraft has to be restarted.
Whenever you want to change shaders, repeat steps 1 -3. The newly installed shader pack will appear on the screen. Optifine has many functions besides shaders. Just start exploring its features for better graphics.


