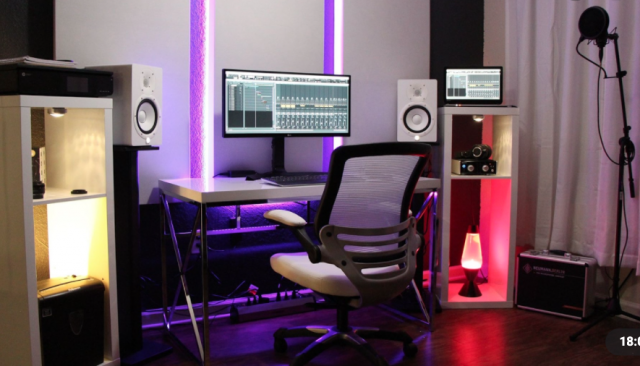
Have you always wanted to record your own music in the comfort of your home? Do you want to create high quality recordings without paying a fortune for studio time? If so, this article is perfect for you! In it we will discuss low budget ways to build a home recording studio. You’ll find everything from tips on low cost equipment choices, how to set up the space, and more.
Why you need a home studio
Contents
- Why you need a home studio
- How to build your own home studio on a low budget
- What equipment do I need for my home studio
- Setting up your home studio – preliminary steps
- Setting up your space – the physical layout of the room
- The recording process – starting with setting-up microphones, prepping instruments
A home studio is the perfect place for a recording artist to work on recording and mixing their songs. The noise reduction techniques of the booth ensure that no extraneous sound can interfere with these critical processes. In addition, it’s a space where you can focus deeply on your work without having to worry about forgetting to pay rent or laundry day.
How to build your own home studio on a low budget
You will need a space to dedicate to your studio. It should be nice and soundproofed for the best recording quality. You will need some sort of flexible acoustic material on the walls like “egg crate” foam or Owens Corning 703 fiberglass insulation panels to lessen the impact of reverb in your studio room. In most cases, this cost will be less than $200 USD per sheet of 4×8 ft. If you have an unfinished basement or attic that’s insulated it may work fine as well and can save on construction time (especially if you don’t want drywall).
What equipment do I need for my home studio
You’ll want to start with a microphone, headphones, mic stand, and Pop Filter. Depending on the type of recording you’re doing (albums? demos? spoken word?), you may need things like a mixer or condenser mic as well. You can save money by buying used equipment if you shop wisely. In general it’s better to buy a ton of cheap gear rather than one expensive one since cheaper gear is easier to sell if you find out that music recording isn’t for you. The budding musician will get more use out of their investment this way also- spending $150 on an amp instead of $400 can get them started gigging and sooner mastering the craft before they invest in anything else.
Setting up your home studio – preliminary steps
– Plan out your budget and figure out how much room you can afford to set aside for furniture/equipment, how big you want the studio to be, what type of equipment you’ll need
– Home studios are all about compromise. Maybe this means skimping on recording gear or the size of a mixing board in order to buy more mics or get an isolation booth.
Setting up a home studio can be done with inexpensive equipment, but the most important factor is what you want to do. If you’re just getting started and want a basic studio to record demos, then there are some great starter packages that are actually less than $100.
Setting up your space – the physical layout of the room
The first and most important issue is the room layout. It pays to draw a plan of what you’re intending to do with your studio, as there are issues such as acoustics, lighting, and access to power points that will need careful planning out prior to any construction (and yes even some recording studios are built from scratch)! The physical layout of the room is about getting an idea in your head on how you can best use the space available for maximum efficiency and soundproofing. For example, it’s better if this side of the studio faces towards where other buildings face – this aids in keeping unwanted sounds out by ensuring less outside sounds seep into these studios. Maximum wall space should have a mirror for recording audio and video. A spot in the room where you can set up your computer, microphones, amplifiers, stands, and chairs to record your band should be situated opposite from the mirror. Leave enough space on either side of this area for equipment. Place monitors facing each other so they are as far apart from each other as possible (around 10 feet). Place them at eye level to evenly distribute sound across all of them – or use some sort of tower solution that allows for an even stereo sound (this is when two speakers face one another).
The recording process – starting with setting-up microphones, prepping instruments
The recording process starts with setting-up microphones, prepping instruments, and setting levels. The basic idea is to get the highest sound quality without overloading anything. Out of all three parts of the recording process, this is the one that takes up most time where many people rush down to mixing later on. It’s important for everyone involved with music production to know as much about mic techniques and different types of instruments as they can in order to optimize their recordings and make them sound their best at any given moment.


